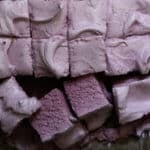
Maple Syrup (Grape?) Marshmallows 🍇
These grape marshmallows (sweetened solely with maple syrup!) are super easy to whip up and lend a delightful fruity note to your favorite summer desserts.
Servings 20 marshmallows
Calories 44kcal
Ingredients
- 1/2 cup grape juice or fruit juice of choice*
- 1 tablespoon purple sweet potato powder for hue (recommended if using an all natural juice)**
- 1 1/2 tablespoons gelatin preferably grass-fed
- 1 cup maple syrup
- pinch kosher salt
serving suggestions
- dark chocolate (salted for the win imho!)
- (almond flour!) graham crackers
Instructions
- Top tip: make sure to have *all* your ingredients handy, measured out, and make sure you won’t be disturbed for 15 minutes. Seriously! They’re easy and quick, but you need to work through the steps continuously and quickly.
- Line a 8x8-inch pan with parchment paper and set aside. If using a stand mixer, fit it with the whisk attachment; otherwise have your hand mixer handy and ready to go.
- Add gelatin and grape juice to your mixer bowl, mix thoroughly with a fork, and allow to bloom for 10 minutes while you heat up the maple syrup.
- Add maple syrup to a saucepan and bring to a boil over medium heat until it reaches soft ball stage. If you've got a thermometer, temperature reaches about 210ºF/100ºC. But don't worry if you don't have one; just be sure to keep it on a rolling boil for about 2 minutes to ensure maximum temperature is reached (in my experience maple syrup doesn't heat up past a certain point).
- Turn your mixer on low to break up the gelatin, and quickly pour in your hot syrup to avoid losing heat. Increase your speed to high, and whisk non-stop for about 10-13 minutes (depends on your room temp). Sprinkle in the pinch of salt at about minute 8. When ready, the mixture will be stiff and hold it's shape well, and if you're using a glass bowl it will feel only lightly warm to touch.
- Turn mixer off and quickly pour the marshmallow batter onto your prepared dish. Don't worry too much about what's left behind in the whisk etc, or your marshmallows will likely set in the bowl itself!
- Allow marshmallows to dry, uncovered and at room temperature, for 6 hours though preferably overnight. Gently remove from pan and cut with a greased knife. In my experience maple marshmallows don't need dusting as they're not overly sticky, and a touch of coconut oil does wonders if need be.
- Store in a cool, dry place for a couple weeks (imho they reach peak charring texture at around week one as they've had the change to dry out for a bit and are less likely to melt away)(but if you're making rice krispie treats you want them ultra fresh!).
Video
Notes
* (&**) using natural grape juice (or any juice) is prime, but it comes with a small caveat: it yields slightly muddled colors. No need to succumb to artificial dyes though, as adding a touch of purple sweet potato powder will brighten up the hue (and no, it doesn't impart a taste as grape is one mighty flavor).
Similarly if you're opting for something like strawberry, diluting some freeze dried strawberry powder and adding a touch of pink dragon fruit (which is fairly taste neutral) will do the trick.
(and do note that when I made these with a grape juice from concentrate they turned out lightly purple in hue without adding anything else)
The Sweetener
This recipe was specifically developed around maple syrup, and any and all kinds will work as long as they’re 100% natural maple (i.e. you don’t want anything with corn syrup and so on). The one thing of note is that while marshmallows are generally made with your ‘sugar mixture’ reaching the soft ball stage ( F), I’ve never been able to get maple syrup to heat past around 210 F. Still, I’ve made them several times already since last summer with various syrups and there doesn’t seem to be an issue whatsoever with their ability to charr properly… they’re perfect for s’mores and rice krispies treats! And p.s. while a thermometer is generally recommended for fool proof candy making, given that once maple syrup comes to a rolling boil and begins to bubble up it the temperature stays the same… if you don’t have a thermometer on hand simply allow the maple to bubble up for about 7 minutes to ensure it’s reached its peak temp.Nutrition
Serving: 1marshmallow | Calories: 44kcal | Carbohydrates: 10g | Protein: 0.4g | Fat: 0.001g | Saturated Fat: 0.001g | Monounsaturated Fat: 0.001g | Sodium: 2mg | Potassium: 35mg | Sugar: 9g | Calcium: 17mg | Iron: 0.02mg